Quantcast
Channel: virtuallyGhetto
Viewing all 217 articles
Browse latest View live

Automating SSL Certificate Expiry Validation for vCenter Server + ESX(i) Hosts

$
0
0
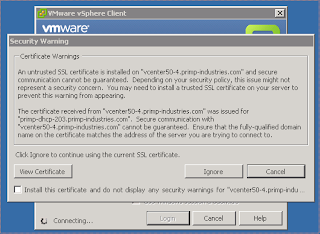
As many of you know, it is a best practice to replace VMware's self-signed SSL certificates that are included in the vCenter Server (Windows & VCSA) and ESX(i) hosts to prevent or help reduce MiTM (Man in The Middle) attacks. If you are looking for more details on how to replace the default SSL certificates, you should take a look at the fantastic articles written by Michael Webster who details the process, provides some troubleshooting steps and best practices for SSL certificate replacement.

Replacing the default self-signed SSL certificate is just one part of the process, but you also need to check to ensure the certificates are still valid and have not expired. If you already have a process in place or a system that automatically does this for you, that is great. If you do not, you should definitely validate that your SSL certificates are valid on a regular basis.

I recently stumbled onto a nifty open source tool called ssl-cert-check that can help with validating expiration of SSL certificates found on vCenter Server(s) and ESX(i) hosts or any other SSL enabled host for that matter. This utility is just a shell script (specifically bournce shell) wrapping the common openssl utility found on most UNIX/Linux systems and does not require any login credentials to the remote hosts to validate the SSL certificate.

To use the script, you can visit the website here and download it to a system that has openssl installed (in my home lab, I used vMA).
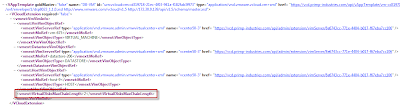
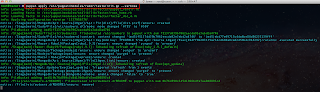
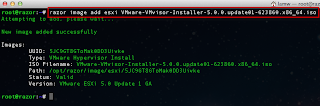
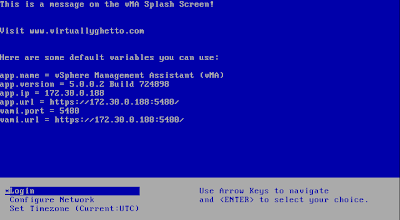
It took me awhile to find the script, but it's located on the right side of the screen where it says "Website". You can also download it from the command-line using wget if you have direct/proxy access to the internet:
$ wget http://freecode.com/urls/353b752faa208fca12bc0091c742f764 -O ssl-cert-check
Note: Don't forget to set the execute permission on the script (chmod +x ssl-cert-check) else you will get permission denied when trying to run the script.

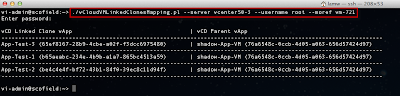
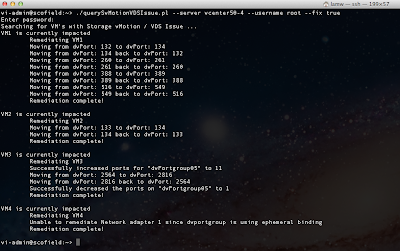
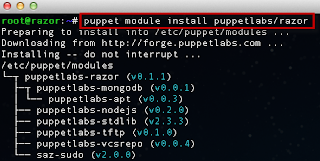
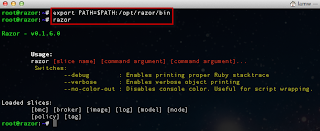
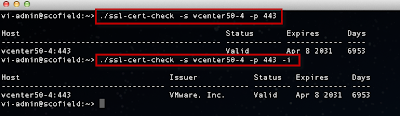
The script can be executed interactively by specifying the -s option for server and -p for the port. You can also specify the issuer of the certificate by using the -i option. Below is a screenshot of running the ssl-cert-check against a vCenter Server:
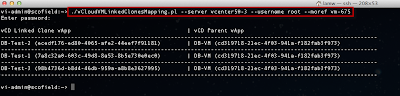
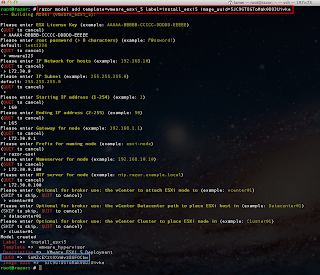
You can also run the script in batch mode by specifying -f option which accepts a list of servers in FQDN along with the port number. Using this feature of the script, you can easily run this script against all your vCenter Server(s) and ESX(i) hosts to ensure that their SSL certificates are still valid.

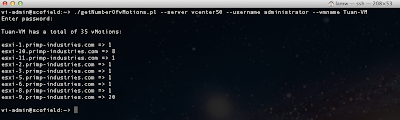
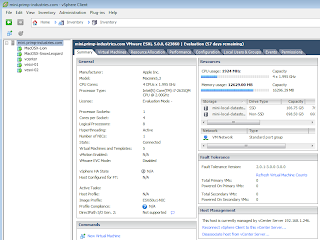
If you already have a list of hosts you want to check, then you can easily create a new file with the hostname and port. Though if you do not have one handy, I wrote a quick vSphere SDK for Perl script called generateESXiHostsList.pl that helps automate the creation of the output file containing all ESX(i) hosts when connecting to a vCenter Server. To use the script, you just need to have vCLI installed on a system or use vMA.

The script accepts one options which is --output which specifies the name of the output file to be created:
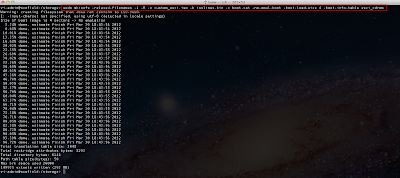
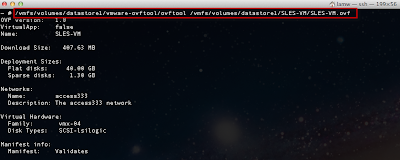
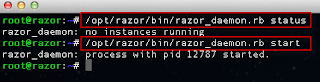
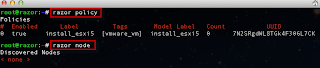
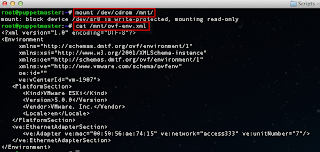
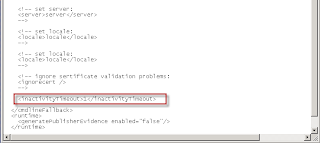
If we "cat" the file out, we can see it looks like the following:
vesxi50-1.primp-industries.com 443
vesxi50-2.primp-industries.com 443
vesxi50-3.primp-industries.com 443
vesxi50-4.primp-industries.com 443


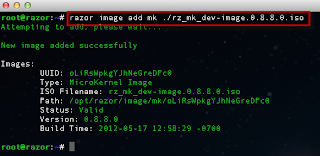
Let's now run the ssl-cert-check against the list of ESX(i) hosts using the -f option and see if we have any hosts with expired certificates:
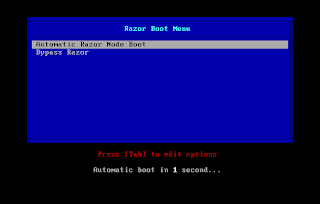
Uh oh, it looks like we have two hosts with some problems. We can see one host that already has an expired SSL certificate and another one that will be expiring in 10 days. We better take a look at these and get them replaced soon!

There are additional options in the ssl-cert-check script including the ability to email the results or run as a nagios check. You can easily schedule a cron job to automate this script to run every week and grepping for the keyword "Expiring" to alert you of any hosts that have expiring SSL certificates. As you can see, it is not only important to replace the default self-signed SSL certificates in your environment, but you need to validate on a routinely basis your your certificates are still valid.

How to Create Bootable ESXi 5 ISO & Specifying Kernel Boot Options

$
0
0
This week I helped to answer a few questions about creating your own ESXi 5 bootable ISO along with automatically using a static IP Address when the custom ISO first boots up. Although all this information is available via the vSphere documentation, it may not always be easy to put all the pieces together and thought I share the steps for others to also benefit.

You will need access to a UNIX/Linux system and a copy of the base ESXi 5 ISO image. In this example I will be using VMware vMA and VMware-VMvisor-Installer-5.0.0.update01-623860.x86_64.iso and walk you through two different configurations. We will also be referencing the vSphere documentation Create an Installer ISO Image with a Custom Installation or Upgrade Script and Kernel Boot Options.

Create ESXi 5 Bootable ISO w/Remote ks.cfg:

In this configuration, we will create a custom ESXi ISO that will boot with a static IP Address and use a remote ks.cfg (kickstart) configuration file.

Step 1 - Mount base ESXi ISO using the "mount" utility:

$ mkdir esxi_cdrom_mount
$ sudo mount -o loop VMware-VMvisor-Installer-5.0.0.update01-623860.x86_64.iso esxi_cdrom_mount

Step 2 - Copy the contents of the mounted image to a local directory called "esxi_cdrom":

$  cp -r esxi_cdrom_mount esxi_cdrom

Step 3 - Unmount the ISO after you have successfully copied it and change into the esxi_cdrom directory

$ sudo umount esxi_cdrom_mount
$ cd esxi_cdrom

Step 4 - Edit the boot.cfg and specifically the "kernelopt" line to not use the weasel installer but kickstart and also specifying the remote location of your ks.cfg. To get more details on the various kernel boot options, please take a look at the vSphere Boot Options documentation above.

You will also need to specify the static IP Address you wish to have the host automatically use when the ISO first boots up on the same line.
Step 5 - Once you have finished your edits and saved the boot.cfg, you will now change back to the parent directory and use the "mkisofs" to create your new bootable ISO. In this example, we will name the new ISO "custom_esxi.iso":

$ sudo mkisofs -relaxed-filenames -J -R -o custom_esxi.iso -b isolinux.bin -c boot.cat -no-emul-boot -boot-load-size 4 -boot-info-table esxi_cdrom/

You now have a new bootable ESXi 5 ISO called "custom_esxi.iso" which will now automatically boot up with the specified static IP Address and install based on the ks.cfg that was specified.

Create ESXi 5 Bootable ISO w/Local ks.cfg:

Similar to the above configuration, we will create a custom ESXi ISO that will boot with a static IP Address but use a local ks.cfg (kickstart) configuration file that will be included within the custom ISO.

Step 1 through 3 is exactly the same as above

Step 4 - By default, a basic ks.cfg is included in the ESXi 5 ISO in /etc/vmware/weasel/ks.cfg and we will create a custom *.tgz file that will include our ks.cfg within the ISO. First off by creating a temporary directory which will be used to store our ks.cfg:

$ mkdir -p temp/etc/vmware/weasel

Step 5 - Copy your ks.cfg file into the temp/etc/vmware/weasel:

$ cp ks_custom.cfg temp/etc/vmware/weasel

Step 6 - Create a *.tgz file containing the path to our ks.cfg using the "tar" utility. In this example, we will called it customks.tgz:

$ cd temp
$ tar cvf customks.tgz *

Step 7 -  Copy the customks.tgz from temp directory to your esxi_cdrom directory:

$ cp temp/customks.tgz esxi_cdrom

Step 8 Change into the "esxi_cdrom" directory and edit the boot.cfg just like the above, but we will be using the "file://" stanza to specify the path to our ks.cfg, static IP Address as well as adding our customks.tgz to the module list to ensure that it loads up which contains the actual ks.cfg file that is called in the boot.cfg.
Step 9 - Same as Step 5 above, you now just need to run the "mkisofs" utility to create your bootable ISO.

You now have a new bootable ESXi 5 ISO called "custom_esxi.iso" which will now automatically boot up with the specified static IP Address and install based on the ks.cfg that is included within the ISO.

Org vDC to vCenter Resource Pool Workflow Using vCenter Orchestrator

$
0
0
I was helping a colleague of mind this evening with a question about retrieving a vCenter Resource Pool given a vCloud Director Organization vDC using vCenter Orchestrator. However, this particular workflow does not exists out of the box with vCO, but with a little help from the vCloud API, we can easily create our own workflow to accomplish this request. We will be leveraging the Query Service introduced in vCloud Director 1.5 and the "orgVdcResourcePoolRelation" query type which provides a mapping between an Org vDC to vCenter Resource Pool.

You can download the vCO workflow that I created called Get Org vDC to Resource Pool Mapping and import it into your vCO environment. You will need to make sure you have the vCloud Director vCO plugin installed.

Here is a example of running the workflow which accepts a vCloud Director Org vDC:
Here is the results of the workflow:
You will notice that it produces the MoRef (Managed Object Reference) to a vCenter Resource Pool instead of the actual Resource Pool object. The reason for this is the query only returns the href of the Org vDC, href of vCenter Server and the MoRef of the Resource Pool. Using the MoRef, you can connect to your vSphere environment and retrieve the Resource Pool, but I will leave that as an exercise for my colleague :-)

Note: If you go through the query types, you may have noticed the resourcePool query type, the reason this will not work is that it only provides a list of root Resource Pools (basically vSphere Clusters) and it does not return the sub-resource pools that are created for Organization vDCs.

Scripts to Extract vCloud Director Chain Length and Linked Clone Mappings

$
0
0
There were some questions this week about extracting the chain length for a virtual machine as well as figuring out which Linked Clones were mapped to a particular vAppTemplate and/or shadowVM in vCloud Director. If you are not familiar with the concept of a Linked Clone (Fast Provisioning in vCloud Director 1.5 leverages Linked Clones) and their relationship to chain length, there is a very good white paper called VMware vCloud Director 1.5 Performance and Best Practices that goes into detail about Linked Clones and some of the things to be aware of from a performance standpoint.

Depending on how you deploy a new vApp whether that is from a vAppTemplate in your catalog or copying from an existing vApp, the chain length of a Linked Clone tree will grow either breadth wise or length wise.
The chain length can grow much faster when copying from an existing vApp and that can impact the performance of your virtual machines. Below is a diagram between deploying from a vAppTemplate in a catalog (breadth wise) and consecutive copies from an existing vApp (length wise).
vCloud Director limits the chain length to 30 and automatically spins up a full clone (called a shadow VM) when the maximum is hit and all sub-sequent Linked Clones will be based off of this new shadow VM. A shadow VM can also spin up automatically if the current datastore is getting to full capacity or if the VM needs to exists on a different vCenter Server as Linked Clones do not span datastores or different vCenter Servers.

To view the current chain length of a given virtual machine, you will need to login with a System Administrator account and this can be seen using the vCloud UI at the VM level. You can also get the chain length using the vCloud API which is part of the VCloudExtension property called VirtualDisksMaxChainLength and can be viewed by performing a GET operation on a VM.
Note: Though the property has "MaxChainLength" in the name, this property represents the current chain length and it is not configurable, as the system max is 30.

To be able to quickly get a summary of the chain length of all VMs that include vAppTemplates and Shadow VMs, I wrote a vCloud SDK for PHP script called vcloudVMChainLength.php. The script provides a few pieces of information: VM name as shown in vCloud Director, name of the vApp the VM is part of in vCloud Director, whether it is a vAppTemplate, the vCenter Server hosting the VM, the MoRef of the VM and chain length.

Before I provide the sample output, let me give you some background about my lab environment. I have two vAppTemplates called "Application Server" and "Database Server". The "Application Server" is currently residing on a datastore with close to full capacity and I will be deploying 3 new vApps from this vAppTemplate called "App-Test-1", "App-Test-2" and "App-Test-3". I will also be deploying 3 new vApps from "Database Server" but only the first clone will be from the vAppTemplate, the remainder will be a clone of the previous vApp in the workspace.

Here is a diagram of the 9 VMs (2 vAppTemplates, 1 shadow VM and 6 vApps):

Here is the sample output of the environment above:
We can see that during the deployment of the "App-Test-*" vApps, the datastore capacity was low and vCloud Director automatically spun up a shadow VM which is a full copy and created the 3 new Linked Clones off of that image and the chain length is max of 2. With the "DB-Test-*", we started out with deploying from the vAppTemplate, but all subsequent copies was from the previous vApp which grew the chain length to 4. If we continue to copy from the vApp length wise, we will quickly reach the maximum chain length and possibly degrade the performance of the VMs as the deepest node will need to traverse back to the parent to perform it's disk read operations. 

The other question I had was about mapping the Linked Clones back to their parent VMs. This is not something you can really do in vCloud Director nor using the vCloud API. However, with a little bit of creativity and information from vCloud Director, you can leverage the vSphere API to help you get a list of VMs that are linked off of a given VM. I wrote a vSphere SDK for Perl script called vCloudVMLinkedClonesMapping.pl that can help you get this information. 

Note: This was tested in my lab which had a minimal configuration, ensure you do additional validation before making any decisions based on the output.

To use the script, you will need to provide the MoRef ID for a VM that is either a vAppTemplate, shadow VM or just a regular VM which may have Linked Clones. You can get this information by using the script that was shown earlier.

Let's take a look at our "Application-Server" VM which has MoRef ID 677 and see if there are any Linked Clones:
As we expected, there are no Linked Clones as the datastore it is currently residing on is getting to full capacity and a shadow VM was spun up for the new 3 deployments.

Let's take a look at the shadow VM "shadow-App-VM" with MoRef ID 721 which is automatically prefix with "shadow-" of the source VM name:
Just as we expected, we can see that our 3 vApps are linked off of the Shadow VM that we just checked.

Note: The output includes the display name and URN ID of the vApp in vCloud Director so you can easily identify it.

Finally, let's take a look at our "Database-Server" VM which has MoRef ID 675 and we should also see the 3 Linked Clones:
You might ask if it is necessary to keep track of all this information and the answer is yes/no. Though it is good to understand how vApps are being deployed by your consumers and ensure they are efficiently doing so by deploying from a catalog. vCloud Director has built in mechanisms to automatically handle deep chain lengths or low datastore space by deploying additional shadow VMs to ensure users are still able to request new vApps without any impact.

Auditing vMotion Migrations

$
0
0
I saw an interesting question this week about auditing vMotion events and the number of times a VM has migrated to a particular ESX(i) host for license compliance. You can view this information using the Task/Events in your vCenter Server but you can also extract out the various types of events using the EventManager in the vSphere API. You will be able to go as far back in time as your vCenter Server's database retention policy allows you to. We will be searching for the VmMigratedEvent Event which will include variety of information including the source and destination host for the VM. The destination host will only be populated upon a successful vMotion.

Of course I had to write a script to help automate this, so here is a vSphere SDK for Perl script called getNumberOfvMotions.pl that accepts the name of an existing VM and will return the number of vMotions that has been performed on the VM as well as the list of destination hosts and the number of times it has migrated to those hosts. You will need a system that has the vCLI installed or you can you use vMA.

Note:  If you want to look at past vMotion for a VM that no longer exists, this is still possible, but you will need to parse the "message" within the Event as you can no longer look up that VM object in vCenter.

Here is an example of the script running:
You can easily modify the script to audit all VM's in your environment or just use a simple "for" loop to go through a set of VM's you are interested in, but I will leave that as an exercise for you.

Extracting SSL Thumbprint from ESXi

$
0
0
While browsing the VMTN forums earlier this week, I noticed an interesting request from a user who was trying to compile an inventory of the SHA1 Thumbprints for all his ESXi hosts. The challenge the user had, was that he was capturing this information manually by "looking" at the DCUI screen which is where the SHA1 Thumbprint for an ESXi host is displayed by default.
As you might have guessed, this can be very tedious and error prone by copying down this very long string by just looking at the screen. Even if you do not make a mistake copying this long string, I bet your eyes will eventually give out. Luckily, there are a few ways to retrieve this information and I will show you some methods to help automate this across all of your ESXi hosts.

Option 1 - Retrieve SSL Thumbprint using the DCUI as shown above, this is going to be the most manual method.

Option 2 - If you have remote SSH or direct console access to ESXi Shell, you can login to your ESXi host and using openssl utility, you can retrieve the SSL Thumbprint which you can then use or copy off to a remote host.

openssl x509 -in /etc/vmware/ssl/rui.crt -fingerprint -sha1 -noout

Option 3 - You can remotely retrieve the SSL Thumbprint by leveraging just the openssl utility and you do not even need to login to the ESXi host. This not only allows you to retrieve the SSL Thumbprint from a centralized location, but you can easily automate this across all your hosts.

echo "" | openssl s_client -connect 172.30.0.252:443 2> /dev/null 1> /tmp/cert
openssl x509 -in /tmp/cert -fingerprint -sha1 -noout

Using Option 3, you can easily wrap this in a simple "for" loop to iterate through all your ESXi hosts as long as you have either the hostname/IP Address. Here is a simple shell script that you can use to iterate through all your ESXi hosts to extract the SSL Thumbprint.

In the script above, I have a list of three ESXi hosts and it is simply going through each host and executing the two commands to extract the SSL Thumbprint and displaying it on the screen.
Option 4 - You can also retrieve the SSL Thumbprint using the vSphere API, but the property is only displayed when it is connected to a vCenter Server. There is a property on the ESXi host called sslThumbprint that is populated when querying against the vCenter Server that is managing the ESXi host. You can use the vSphere Health Check script which captures this and other useful information about your vSphere infrastructure.

As you can see, there are several options on obtaining the SSL Thumbprint for an ESXi host, you definitely do not have to manually read it off the DCUI screen. Automation FTW again! :-)

Identifying & Fixing Virtual Machines Affected By SvMotion / VDS Issue

$
0
0
UPDATE 07/13/2012 - vSphere 5.0 Update 1a has just been released which resolves this issue, please take a look here for more details for the patch as this script is no longer required.

Duncan Epping recently wrote an article about Clarifying the SvMotion / VDS problem in which he describes the scenario that would impact your VMs as well as a way to remediate those impacted VMs. I would recommend you go through Duncan's article before moving any further.

The challenge now, is how to easily identify all VMs that are currently impacted by this problem in your environment? The answer is of course Automation and leveraging the vSphere API! I created the following vSphere SDK for Perl script called querySvMotionVDSIssue.pl which searches for all VMs that are connected to a VDS and checks whether or not it's expected dvPortgroup file exists in the appropriate datastore. To use the script, you just need a system with the vCLI installed or you can just use the vMA appliance.

UPDATE: The script has now been updated to support remediation for VMs connected to both a VMware VDS as well as Cisco N1KV. The solution, thanks to one of our internal engineers was to "move" the VM's dvport from one to another, all while staying within the existing dvPortgroup which will also force the creation of the .dvsdb port file. Once the dvport move has successfully completed, we will move it back to it's original dvport that it initially resided on. We no longer have to rely on creating a temporally dvPortgroup and best of all, we can now remediate both VDS and N1KV. The script now combines both the "query" and "remediation" into single script. Please take a look at the examples below on usage.

Disclaimer: This script is not officially supported by VMware, please test this in a development environment before using on production systems.

Here is a sample output of the script running in "query" mode:
Only impacted VMs will be listed in the output. To remediate, I have combined the remediation script into the query script, if you wish to remediate ALL VMs that were listed as being impacted, you can specify the --fix flag and providing the option "true". This will go ahead and remediate all impacted VMs that were listed as before.

Here is a sample output of the script running in "remediation" mode:
In the screenshot above, you may noticed a few interesting details with VM3 and VM4. If you run out of dvports in a dvPortgroup, the script will automatically increase the number of ports to satisfy the swap (max of 10 due to number of ethernet interfaces a VM can have). Once the VM has been remediated, the dvportgroup will be reconfigured to it's original configured number of ports as shown with VM3.

If you have an impacted VM that is connected to an ephemeral dvportgroup, we will not be able to remediate due to the nature of how an ephemeral binding works. You will get a message on the specific interface and you will need to manually remediate using the steps outlined by Duncan or using the "old" remediation script which will create a temporally dvPortgroup (again, this will only work for VMware VDS' only).

If you run into any issues or have questions, feel free to leave a comment.

Disable LUN During ESXi Installation

$
0
0
For many of us who worked with classic ESX back in the day, can recall one of the scariest thing during an install/re-install or upgrade of an ESX host that had SAN attached storage, was the potential risk of accidentally installing ESX onto one of the LUNs that housed our Virtual Machines. As a precaution, most vSphere administrators would ask their Storage administrators to either disable/unplug the ports on the switch or temporarily mask away the LUNs at the array during an install or upgrade.

Another trick that gained popularity due to it's simplicity was unloading the HBA drivers before the installation of ESX began and this was usually done as part of the %pre section of a kickstart installation. This would ensure that your SAN LUNs would not be visible during the installation and it was much faster than involving your Storage administrators. With the release of ESXi, this trick no longer works. Though, there have been several enhancements in the ESXi kickstart to allow you to specify specific types of disks during installation, however, it is possible that you could still see your SAN LUNs during the installation.

I know the question about disabling the HBA drivers for ESXi comes up pretty frequently and I just assumed it was not possible. A recent question on the same topic in our internal Socicalcast site got me thinking. With some research and testing, I found a way to do this by leveraging LUN masking at the ESXi host level using ESXCLI. My initial thought was to mask based on the HBA adapter (C:*T:*L:*) and this would still be somewhat manual depending on your various host configurations.

The above solution was not ideal, but with the help from some of our VMware GSS engineers (Paudie/Daniel), they mentioned that you could create claim rules based on variety of criteria, one of which is the transport type. This meant that I could create a claim rule to mask all LUNs that had one of the following supported transport type: block, fc, iscsi, iscsivendor, ide, sas, sata, usb, parallel or unknown.

Here are the following commands to run if you wish to create a claim rule to mask away all LUNs that are FC based:

esxcli storage core claimrule add -r 2012 -P MASK_PATH -t transport -R fc
esxcli storage core claimrule load
esxcli storage core claiming unclaim -t plugin -P NMP
esxcli storage core claimrule run

Another option that was mentioned by Paudie, was that you could also mask based on a particular driver, such as the Emulex driver (lpfc680). To see the type of driver a particular adapter is being supported by, you can run the following ESXCLI command:

esxcli storage core adapter list

Here is a screenshot of a sample output:
For more details about creating claim rules be sure to use the --help option or take a look at the ESXCLI documentation starting on pg 88 here.

Now this is great, but how do we go about automating this a bit further? Since the claim rules would still need to be executed by a user before starting an ESXi installation and also removed after the post-installation. I started doing some testing with creating a customized ESXi 5 ISO that would "auto-magically" create the proper claim rules and remove them afterwards and with some trial/error, I was able to get it working.

The process is exactly the same as laid out in an earlier article How to Create Bootable ESXi 5 ISO & Specifying Kernel Boot Option, but instead of tweaking the kernelopt in the boot.cfg, we will just be appending a custom mask.tgz file that contains our "auto-magic" claim rule script. Here is what the script looks like:
The script above will create a claim rule to mask all FC LUNs before the installation of ESXi starts, this ensure that the FC LUNs will not be visible during the installation. It will also append a claim rule remove to /etc/rc.local which will actually execute before the installation is complete, but does note take effect since it is not loaded. This ensures the claim rule is automatically removed before rebooting and we also create a simple init.d script to clean up this entry upon first boot up. All said and done, you will not be able to see your FC LUNs during the installation but they will show up after the first reboot.

Disclaimer: Please ensure you do proper testing in a lab environment before using in Production.

To create the custom mask.tgz file, you will need to follow the steps below and then take the mask.tgz file and follow the article above in creating a bootable ESXi 5 ISO.

  1. Create the following directory: mkdir -p test/etc/rc.local.d
  2. Change into the "test/etc/rc.local.d" directory and create a script called mask.sh and copy the above lines into the script
  3. Set the execute permission on the script chmod +x mask.sh
  4. Change back into the root of the "test" director and run the following command: tar cvf mask.tgz *
  5. Update the boot.cfg as noted in the article and append mask.tgzto the module list.
Once you create your customized ESXi 5 ISO, you can just boot it up and either perform a clean installation or an upgrade without having to worry about SAN LUNs being seen by the installer. Though these steps are specific to ESXi 5, they should also work with ESXi 4.x (ESXCLI syntax may need to be changed), but please do verify before using in a production environment.

You can easily leverage this in a kickstart deployment by adding the claim rule creation in the %pre section and then adding claim rule removal in the %post to ensure that upon first boot up, everything is ready to go. Take a look at this article for more details for kickstart tips/tricks in ESXi 5.

Automatically Remediating SvMotion / VDS Issue Using vCenter Alarms

$
0
0
UPDATE 07/13/2012 - vSphere 5.0 Update 1a has just been released which resolves this issue, please take a look here for more details for the patch as this script is no longer required. 

In my previous article Identifying & Fixing Virtual Machines Affected By SvMotion / VDS Issue, I provided a script for users to easily identify the impacted VMs as well as a way to remediate them. Though the the issue was only temporarily fixed, as any of the remediated VMs can be re-impacted if they are Storage vMotion again (manually or automatically) by Storage DRS. This meant that users would to re-run these scripts every so often to ensure their environment is not affected by this problem.

I decided to look into a more automated and hands-off approach in which a Storage vMotion of a VM will automatically trigger the execution of the remedation script. I was able to successfully accomplish this by leveraging vCenter Alarms and running a script on the vCenter Server (Here's a cool thing I did with alarms awhile back) .

Disclaimer: This script is not officially supported by VMware, please test this in a development environment before using on production systems. 

You can create the alarm at any level of the inventory hierarchy, but I would recommend placing it at least at the datacenter or cluster level. The alarm type will be for a VirtualMachine and it we use "monitor for specific events". For the trigger, we will need to use "VM migrated" and set the status to "Unset" which will not create an alarm icon when it is triggered.
You might wonder why we selected "VM migrated" versus "VM relocated" and this is actually due to the fact that a Storage vMotion starts out just like a vMotion and if you manually perform a vMotion or Storage vMotion, only this event type will be triggered. Due to this single event being triggered by two completely different operations, it has an interesting impact which we will discuss in a bit.

Next we need to create an action for this alarm which will be running a command, you will need to specify the full path to perl.exe (assuming you're using my script which is based on vSphere SDK for Perl and you will need to have vCLI installed on the vCenter Server) as well as the path to the alarm script which in this example is called alarm.pl. Also ensure you set the green->yellow action to execute once.
You will need to create the alarm.pl script on your vCenter Server and here is what it looks like:
#!/usr/bin/perl -w
# William Lam
# http://www.virtuallyghetto.com/

use strict;
use warnings;

my $scriptlocation = "C:\\querySvMotionVDSIssue.pl";
my $server = "localhost"
my $username = "VC-USERNAME";
my $password = "VC-PASSWORD";
my $debug = 0;

###########################
# DO NOT MODIFY PAST HERE #
###########################

my $start1 = "from";
my $start2 = "to";
my $end = ",";

# extract VMware env variables from alarm
my $eventstring = $ENV{'VMWARE_ALARM_EVENTDESCRIPTION'};
my $vmname = $ENV{'VMWARE_ALARM_EVENT_VM'};

my @sourcehost = $eventstring =~ /$start1 (.*?)$end/;
my @destinationhost = $eventstring =~ /$start2 (.*?)$end/;


# Output environmental variables to see what's up
if($debug) {
open(FILE,">C:\\output.txt");
foreach my $key (keys %ENV) {
print FILE $key . "=" . $ENV{$key} . "\n";
}
close(FILE);
}

# if the source/destination host is the same, means we had a Storage vMotion instead of vMotion
# and we execute the remediation script on the VM
if($sourcehost[0] eq $destinationhost[0]) {
`"$scriptlocation --server $server --username $username --password $password --vmname $vmname --fix true"`;
}

You will need to fill in the script location, in this example I have all scripts stored in C:\ and you will also need to populated the credentials which will be used to execute the script. 

Earlier we mentioned that both a Storage vMotion and vMotion trigger the same event and because of that, we need to be able to identify when a Storage vMotion actually happens to run the script. The alarm.pl script above will be executed when the alarm is triggered and using the VMware specific environmental variables that is populated from the vCenter Alarm, we can extract from the event description to figure out whether it was a vMotion or Storage vMotion. Once we confirm it is a Storage vMotion, we then execute our remediation script which is from my previous article.

Note: Ensure you download the latest version of of the querySvMotionVDSIssue.pl from the previous article, as it has been updated to handle single remediation and targeted for this use case.

Now to verify that our alarm is functioning as expected, we can perform a manual Storage vMotion of a VM and we should see our alarm.pl execute and then after the Storage vMotion has completed, we should see some VM reconfiguration tasks which is from our remediation script.
So there you have it, you no longer have to worry about running the script every so often to ensure your VMs are not being impacted by the SvMotion / VDS problem. Again, I would like to stress though we are able to automate this remediation, this is not a real solution and VMware is actively working on a fix for this problem.

If you have any questions, feel free to leave a comment.

vSphere Security Hardening Report Script for vSphere 5

$
0
0
The much anticipated vSphere 5 Security Hardening Guide was just released last week by VMware and includes several new guidelines for the vSphere 5 platform. In addition to the new guidelines, you will also find that the old vSphere 4.x guideline identifiers (e.g. VMX00, COS00, VCENTER00) are no longer being used and have been replaced by a new set of identifiers. You might ask why the change? Though I can not provide any specifics, but rest assure this has been done for a very good reason. There is also a change in the security guidance levels, in the vSphere 4.x guide, you had enterprise, SSLF and DMZ and with the vSphere 5 guide, you now have profile1, profile2 and profile3 where profile1 provides the most secure guidelines. To get a list of all the guideline changes between the 4.1 and 5.0 Security Hardening Guide, take a look at this document here.

I too was impacted by these changes as it meant I had to add additional logic and split up certain guidelines to support both the old and new identifiers in my vSphere Security Hardening Script. One of the challenges I faced with the old identifiers and creating my vSphere Security Hardening Script is that a single ID could be applicable for several independent checks and this can make it difficult to troubleshoot. I am glad that each guideline is now an individual and unique ID which should also make it easier for users to interpret.

To help with your vSphere Security Hardening validation, I have updated my security hardening script to include the current public draft of the vSphere 5 Security Hardening Guide. You can download the script here.

Disclaimer: This script is not officially supported by VMware, please test this in a development environment before using on production systems.  

The script now supports both a vSphere 4.x environment as well as vSphere 5.0 environment. In addition to adding the new guideline checks and enhancing a few older ones, I have also included two additional checks that are not in Hardening Guide which is to verify an ESX(i) host or vCenter Server's SSL certificate expiry. I recently wrote an article on the topic here, but thought this would be a beneficial check to include in my vSphere Security Hardening Script. If you would like to see the verification of SSL certificate expiry in the official vSphere 5 Security Hardening Guide, please be sure to provide your feedback here.

Here is a sample output for the Security Hardening Report for a vSphere 5 environment using "profile2" check:
vmwarevSphereSecurityHardeningReport-SAMPLE.html

UPDATE (06/03/12): VMware just released the official vSphere 5 Security Hardening Guide this week and I have also updated my script to include all modifications. If there are any feedback/bug reports, please post them in the vSphere Security Hardening Report VMTN Group.

If you have any feedback/questions, please join the vSphere Security Hardening Report VMTN Group for further discussions.

Removing Previous Local Datastore Label for Reinstall in ESXi 5

$
0
0
If you reinstall ESXi 5 on system that had a previous copy, one thing you might have noticed is the local VMFS datastore label is preserved. This is also true if you perform an unattended installation using kickstart and specifying the overwritevmfs parameter, a new VMFS volume is created but it still uses the old label. This can cause some issues for scripted installs where you decide to rename the local datastore from the expected default "datastore1" label.

Though it is actually pretty easy to get around this problem by deleting the VMFS partition prior to starting the new ESXi installation. Below are three methods depending on the installation option you have chosen. Please be absolutely sure about the VMFS volume prior to deleting the partition.

Method 1 - While you still have login access to previous ESXi install


If you still have access to the system before the re-install, you can delete the VMFS partition before rebooting and starting the installation (ISO or kickstart). You will first need to identify the device that is backing your local datastore, you can use the following ESXCLI command which will provide a mapping of your datastore to device.
You will need to make a note of the "Device Name" which can be a naa.* or mpx.* depending on how your ESXi host identifies the disk. You should also make a note of the partition number for the VMFS volume which we will also confirm in the next step. Using the partedUtil we can check the partitions found on the disk and we can confirm that partition 3 is being used for VMFS. Using the "getptbl" option and specifying the full path to the disk which is under /vmfs/devices/disks/naa.* we can retrieve the partition info as shown below.
Now we just need to delete this partition which will wipe the VMFS headers which includes the datastore label. We can do this by using partedUtil and using the "delete" option which will require the full path to the disk in our previous step.
You can now reinstall ESXi and it will use "datastore1" as it's default VMFS label.

Note: The disk that contains the local ESXi 5 install will always have VMFS as the 3rd partition, where as other VMFS volumes will only have a single partition.

Method 2 - During manual installation using ESXi 5 ISO


When you boot up the ISO, you are brought to the "Welcome to VMware ESXi 5.0.0 Installation" page, you will need to login to ESXi Shell by pressing ALT+F1. The username will be root and there is no password, just hit enter. Just like in Method 1, you will need to identify the device for your local datastore but instead of using esxcli, you will need to use localcli as hostd is currently not running.

Here is a screenshot of the identifying the local datatstore device and deleting the VMFS partition:
You can now jump back to the installer by pressing ALT+F2 and continuing with the reinstall and it will use "datastore1" as it's default VMFS label.

Method 3 - Kickstart Installation


If you wish to ensure that the default "datastore1" label is always available for scripted installs, you can using the following snippet in your %pre section of your kickstart. This will search for all disks under /vmfs/devices/disks and  find the deivce that is backing a local ESXi installation and delete it's VMFS partition prior to starting the installation. 
Note: To be extra cautious, you should also consider disabling any additional remote LUNs that can be seen during the installation using the trick found here.

Enabling/Disabling EVC using the vSphere MOB

$
0
0
There were some discussions this morning on twitter regarding the configuration of EVC for a vSphere Cluster using one of the vSphere CLI's such as PowerCLI or directly leveraging the vSphere API. Unfortunately, this is not possible today as the operations pertaining to EVC are not currently exposed in the vSphere API. This means you will not be able to use the vCLI, PowerCLI, vCO or the vSphere API to configure and manage EVC configurations, you will need to use the vSphere Client to do so.

Having said that, one could still "potentially" automate EVC configurations using the vSphere MOB interface using the private vSphere API, but it may not be ideal and will require some "creativity" and custom coding to integrate with your existing automation solution. This particular limitation of the vSphere API is one that I have personally faced and have filed a bug with VMware awhile back. I am hoping this will eventually be added to the public vSphere API, so that users can fully automate all aspects and configurations of a vSphere Cluster.

Disclaimer: This is not officially supported by VMware, use at your own risk and discretion.

Step 1 - Connect to your vCenter MOB and traverse to the vSphere Cluster of interest (note the MOID will be different in your specific cluster).

Step 2 -  Now replace the URL with the following while substituting the cluster MOID that you see in your browser:
https://reflex.primp-industries.com/mob/?moid=domain-c1550&method=transitionalEVCManager
and hit enter and you'll be brought to TransitionalEVCManager() method, you'll then want to click on the "Invoke Method". Once you do so, you should be returned with a task object and you'll have a link to something like evcdomain-cXXXX. Click on this and you'll be brought to ClusterTransitionalEVCManager.

Step 3 - From here you'll have have some basic evcState information which you can click on to see what the current EVC configuration is set to, guaranteedCPUFeatures and valid EVC Modes (the last part will be important for reconfiguring EVC)

Step 4 - Now let's say the cluster currently has EVC Mode set to intel-merom and you would like to change it to Nehalem, you would need to retrieve the key from the previous page, in our example it's intel-nehalem. Now, you need to click on the method link called ConfigureEVC_Task which is pretty straight forward, it just accepts the EVC Mode Key, enter the string and click on "Invoke Method" and now your cluster will be reconfigured if you go back to the evcState or look at your vCenter task. You can also disable EVC by using DisableEVC_Task
 
Note: If EVC is already configured in your vSphere Cluster, you can use the vSphere API to view it's current configuration by looking at the ClusterComputeResource's summary property. You just will not be able to make any changes or disabling EVC using the vSphere API.

How to Deploy an OVF/OVA in the ESXi Shell

$
0
0
I recently answered, what I thought was pretty straight forward question on the VMTN forums about whether it was possible to to deploy an OVA directly onto an ESXi host without leveraging remote tools such as the vSphere Client or the ovftool. The response that I provided was, no it was not possible to deploy an OVF/OVA within the ESXi Shell and recommended the user to take a look at the vSphere Client or the ovftool.

For whatever reason, my brain decided to ponder about this specific question over the weekend (even though I had answered dozen or so questions earlier in the week) and came up an idea that could make this work. As many of you know, I am a big fan of the ovftool and I have written several articles about the tool such as here and here. I wanted to see if I could get the ovftool to run in the ESXi Shell as all the necessary libraries and required packages are all self contained within /usr/lib/vmware-ovftool directory. If this works, it would allow a user to deploy a VM from an OVF or OVA format within the ESXi Shell and would not require a remote system which is great for kickstart deployments or ISO installations. As you probably have guessed, I was able to get this to work :)

Disclaimer: This is not officially supported by VMware, please test this in a lab before deploying on production systems. 

Before you begin, you will need to get the ovftool installed on an existing Linux system, you can use vMA for your convenience. Next, you will need to use the scp command to copy the entire /usr/lib/vmware-ovftool directory onto an ESXi host. Ensure you place the contents on either a shared or local datastore as the size of the ovftool content is quite large (~119 MB).

In this example, I am scp'ing the ovftool directory to a local VMFS datastore (/vmfs/volumes/datastore1)
scp -r /usr/lib/vmware-ovftool/ root@vesxi50-7:/vmfs/volumes/datastore1
Once you have successfully copied the ovftool directory over to your ESXi host, you will need to make a small tweak to the file located in /vmfs/volumes/datastore1/vmware-ovftool/ovftool (shell script that calls the ovftool binary). You will need to modify the the first line using the vi editor from #!/bin/bash to #!/bin/sh as ESXi does not recognize the bash shell. You are now ready to copy an OVF or OVA to your ESXi host which should also reside within a shared or local datastore.

In this example, I uploaded a SLES OVF to the same datastore which contains the ovftool as seen below from the datastore browser:
Let's go ahead and perform a simple probe operation on the OVF we just uploaded to ensure that ovftool is working as expected. To do so, you just need to specify the full path to the ovftool as well as the full path to either your OVF or OVA file.
Note: The ovftool does take slightly longer to run in the ESXi Shell compared to a regular system with the ovftool installed.

Now that we have confirmed the ovftool is working, let's go ahead and deploy from the OVF image. Even though we are running the ovftool locally in the ESXi Shell, you will still need to specify the credentials to your ESXi host during deployment as ovftool was not designed for this use case.
Note: You must specify both the username and password in the ovftool command line, as the password prompt does not function properly in the ESXi Shell and you will see a looping of  "*" characters on the screen.

If you are familiar with the ovftool, you know you can specify an OVF/OVA from both a local resource as well as remote location such as a web server. Here is another example of deploying an OVF from a remote web server:
We can see that is pretty easy to deploy an OVF or OVA from within the ESXi Shell, but what about unattended installations such as ESXi kickstart? Yep, we can do that too! The easiest way is to compress the vmware-ovftool directory using tar command and then download it remotely using the wget command during the %firstboot stanza. I would also recommend placing your OVF/OVA images on a remote web server as well for centralize management and deployment.

Here is the sample code snippet that can be used in your kickstart:
# download ovftool tar to local storage
wget http://air.primp-industries.com/vmware-ovftool.tar.gz -O /vmfs/volumes/datastore1/vmware-ovftool.tar.gz

# extract ovftool content to /vmfs/volumes/datastore1
tar -xzvf /vmfs/volumes/datastore1/vmware-ovftool.tar.gz -C /vmfs/volumes/datastore1/

# deploy OVF from remote HTTP source
/vmfs/volumes/datastore1/vmware-ovftool/ovftool -dm=thin -ds=datastore1 "--net:access333=VM Network" "http://air.primp-industries.com/SLES-VM/SLES-VM.ovf" "vi://root:vmware123@172.30.0.192"

# power on VM
vim-cmd vmsvc/power.on $(vim-cmd vmsvc/getallvms | grep "SLES-VM" | awk '{print $1}')
As you can see, virtually anything is possible ... even if you thought it was not earlier :)

How to Deploy ESXi 5 Using Razor & Puppet

$
0
0
Earlier this week the extraordinary uber super star Nicholas Weaver released a new open source project that he's been working on called Razor (not related to vShaving). I would highly recommend you check out his blog post here for more details about the project. Since Razor deals with Automation which I am always interested, I decided to give Razor a try and see how easy it is to install, configure and deploy.

I also want to mention that this was my first time using Puppet and though there are some videos and guides, it still may not be trivial for new users on what is needed. I thought I walk you through the steps I took to quickly stand up several ESXi 5 hosts in minutes using Razor.

Step 1 - Install Ubuntu Precise (Ubuntu Server 12.04 LTS) which will be your Razor server

Step 2 - For a clean installation of Precise, you will need two additional packages: git and make as well as Puppet. Using the following command, it will pull down the latest updates as well as adding the apt.puppetlabs.com repot to install Puppet:
apt-key adv --recv-key --keyserver pool.sks-keyservers.net 4BD6EC30

apt-get update
apt-get -y install lsb-release
distro=$(lsb_release -i | cut -f 2 | tr "[:upper:]" "[:lower:]")
release=$(lsb_release -c | cut -f 2)

cat > /etc/apt/sources.list.d/puppetlabs.list <
<

EOFAPTREPO
deb http://apt.puppetlabs.com/${distro}/ ${release} main
EOFAPTREPO

apt-get update
apt-get -y install git make puppet
Note: Thanks to Nan Liu for this quick snippet!


Step 3 - You will need to change the ownership of puppet module directory by running the following command:
chown -R puppet:puppet /etc/puppet/modules
Step 4 -  To verify that you have successfully installed Puppet 2.7.14, you can run the following command which should return you the version:
puppet --version
Step 5 -  Now you will install the Razor module using puppet by running the following command:
puppet module install puppetlabs/razor
Step 6 - Next you will initialize and setup Razor by running the following command (this will take a few minutes to complete):
puppet apply /etc/puppet/modules/razor/tests/init.pp --verbose
Step 7 -  Now to verify that Razor has been properly installed, we will go ahead and run it and it should return you the usage options. The path to the razor command is under /opt/razor/bin/razor and we will go ahead and add it to our system path so we can just run "razor". Run the following commands:
export PATH=$PATH:/opt/razor/bin
razor

Step 8 -  Finally we also need to ensure that the Razor web services is running, this is currently a known issue which hopefully will be fixed very soon. By default, the web service should automatically start by itself, but currently you need to manually start it. You can run the following commands to verify the status and then start it:
/opt/razor/bin/razor_daemon.rb status
/opt/razor/bin/razor_daemon.rb start
Step 9 - When you power on your host, Razor will need to load a micro-kernel (MK) image for it to register with the Razor server and provide information about your bare metal host or VM. The following command will download and import the MK ISO image into Razor:
wget https://github.com/downloads/puppetlabs/Razor/rz_mk_dev-image.0.8.8.0.iso
razor image add mk ./rz_mk_dev-image.0.8.8.0.iso
Step 10 - Razor automatically comes with a TFTP server, you just need to have a DHCP server which will forward the request to the Razor server. I will assume you have or know how to setup a DHCP server and here is an example of what my DHCP configuration  looks like for several "virtual" ESXi Shells which I plan on provisioning with ESXi 5:
Note: You just need to set the next-server stanza to your Razor server and the filename to "pxelinux.0" which exists on Razor server

Step 11 - To verify we have no nodes that have registered with Razor, we can run the following command:
razor node
Step 12 - To deploy ESXi 5 on our hosts, we will need a copy of the ESXi 5.0 ISO. In this example I am importing the latest ESXi 5.0 Update 1 image using the following command (you will need to download and upload the ISO to your Razor server via SCP/WinSCP):
razor image add esxi VMware-VMvisor-Installer-5.0.0.update01-623860.x86_64.iso
Note: You will notice the type for the image is "esxi" versus "os" if you are planning on installing regular guestOSes.

Step 13 - Next we will create a Model which describes an ESXi 5 install and it's configurations. You will need to make a note of the UUID of the ISO we just uploaded from the previous step. Run the following command to create the model:
razor model add template=vmware_esxi_5 label=install_esxi5 image_uuid=5JC9GT8GToMak0DD3Uivke
Note: You will also be asked to fill out a few properties such as the license and password for your ESXi host as well as the network information. If you are interested in the kickstart that is being used for the ESXi deployments, you can take a look at /opt/razor/lib/project_razor/model/esxi/5/kickstart.erb. If you would like to adjust the kickstart file, be sure to take a look here.

Step 14 - Okay, we are almost done! Now we just need to create a policy which binds the model to some set of attributes, such as the tags on our ESXi hosts that we wish to build. In my lab, I created a few vESXi hosts using steps found here and then creating a few Linked Clones so I did not have to waste any storage space using this script here. If you are using a vESXi host, by default you will get the vmware_vm tag which is what our base our policy on. Run the following command to create the policy:
razor policy add template=vmware_hypervisor label=install_esxi5 model_uuid=2w1QEGbkoXDELc6ndXb13A broker_uuid=none tags=vmware_vm enabled=true
Note: You will need the UUID of the model you just created which is highlighted in blue in the previous screenshot when creating the policy.

Step 15 - We can check our policy and confirm there are no nodes registered to Razor again, by running the following commands:
razor policy
razor node
Step 16 - Now you are ready to power on your hosts and they should automatically get an IP Address from your DHCP server and forward your request to Razor and perform an iPXE boot.
Step 17 - Once the hosts have booted up the MK image and register with Razor, you should be able to run the following commands to see the nodes and their states:
razor policy
razor policy active
As you can see from the screenshots, I have 5 nodes that have registered and 4 of them are already in the postinstall process and the ESXi installation should be completely very shortly. If you head over to your hosts, you see that ESXi is completely installed and ready for use:
So there you have it, you can quickly provision from bare metal to a fully functional working ESXi 5 hosts literally within minutes (after the config setup of course). I still think there could be some improvements on the CLI help options (though Razor is still in beta), it was not always intuitive on the options for the commands and luckily I had Nick's video and the Wiki to help out with the options. All in all, Razor was very easy to use (especially for a first timer like myself) and though I was not able to get the vCenter Server modules to work ... since they haven not been released yet ;). I am really looking forward to seeing those modules get released soon by Puppetlabs.

If you are interested in learning more about Razor, I highly recommend you check out Nick's blog here as well as the Razor project's Wiki on Github here and help provide feedback or even contribute code back to the project. Great job again Nick and team!

That's so cool! Running ESXi 5 on Apple Mac Mini

$
0
0
Those of you who follow me on twitter should know that I recently got my hands on an Apple Mac Mini Server (Thanks Randy K.) and are probably thinking I would install Apple OSX on the Mini. Nope! I am actually running vSphere ESXi 5 on the Mac Mini!

Disclaimer: This is not officially supported by VMware. Use at your own risk.

Note: I did not have a spare monitor at home and luckily the Mac Mini has a DVI output which I was able to connect to my 46" TV. Nothing like ESXi on the big screen :-)

Even though this is not officially supported by VMware, it is still a very cool solution and the Mac Mini is great form factor for a vSphere home lab. I also want to mention that this was only possible with the research from the folks over at Paraguin Consulting who initially blogged about the process needed to get ESXi 5 running on a Mac Mini. I would highly recommend you check out their blog post which provides additional details as well as a step by step installation guide including screenshots for each step.

I did not have access to an Apple Super Drive which is what the Paraguin folks used in their installation guide, as they thought formatting a USB key would have taken too long ... and who has a CD burner these days? ;) There is also an additional step that is needed to get network connectivity which requires the user to manually install a network driver on the ESXi host.

I decided to go down the route of using a USB key to perform the installation and using a spare 1GB USB key, I created a custom ESXi installation that included the network driver which allows for network connectivity during and after the installation.

What you will need:

Step 1 - Extract the offline bundle "tg3-3.120h.v50.2-offline_bundle-547149.zip" from Broadcom zip file

Step 2 - Use Image Builder to add the Broadcom driver and create a custom ESXi 5 ISO (steps taken from this VMware KB article)

# Add the ESXi 5.0 Update 1 Offline Bundle
Add-EsxSoftwareDepot "C:\VMware-ESXi-5.0.0-623860-depot.zip"

# Add the Broadcom Offline VIB
Add-EsxSoftwareDepot "C:\tg3-3.120h.v50.2-offline_bundle-547149.zip"

# Create a new Image Profile (in example, I'm using the full version w/tools)
New-EsxImageProfile -CloneProfile "ESXi-5.0.0-623860-standard" -name "ESXi50u1-Custom"

# Add the broadcom driver to our Image Profile
Add-EsxSoftwarePackage -ImageProfile "ESXi50u1-Custom" -SoftwarePackage "net-tg3"

# Create an ISO from our custom Image Profile
Export-EsxImageProfile -ImageProfile "ESXi50u1-Custom" -ExportToISO -filepath C:\VMware-ESXi-5.0u1-Custom.iso

Step 3 - Plug in a USB key into your system and run UNetbootin which will take the custom ISO we just created and make it bootable on the USB key

Step 4 - Finally, power on your Mac Mini and plug in the USB key. You can either hold the "Alt" or "Command" key while the system is booting and select the EFI volume OR just plug the USB key and the ESXi installer should automatically start up.

After a few minutes, you should now have ESXi 5 running on your Mac Mini, here is my setup:
Note: If you wish to add a custom kickstart file so it automatically installs and configures the host, take a look at this blog post for the details.

Since you are running ESXi on Apple hardware, you can also create Mac OSX Virtual Machines (10.5 Server and 10.6 Server) and with the latest release of vSphere 5.0 Update 1, OSX 10.7 (Lion) is now officially supported. To install OSX 10.7 as a VM, make sure you follow the instructions here.

Here is a screenshot of running OSX Lion 64bit as a VM running on ESXi 5 running on a Mac Mini :D
If you are looking to refresh your vSphere home lab, definitely consider looking at the Mac Mini, especially when the 16GB DIMMs are available you can get up to 32GB. Also if you are wondering if other people are doing this, I would recommend you check out Christopher Well's vSamarai blog here which details his experience using the Mac Mini as well as voting for his VMworld CFP which will also include topic about running ESXi on Mac Mini.

I want to thank Randy K. again for lending me the Mac Mini, you rock dude! Hopefully this will not be the last article about the Mac Mini ;)


OVF Runtime Environment

$
0
0
I recently noticed a trend of questions from various users about extracting specific bits of information such as the version of ESXi that's running or the MoRef ID of the VM, all while within the guestOS. I had already written an article about this topic awhile back called How to extract host information from within a VM? but it seems like there is still a continued interest to easily obtain this information about the underlying vSphere infrastructure from within the guestOS.

I came across another method while researching a different topic which is to use the vApp property of a VM called the OVF runtime environment. This is a feature that has been around since the early days of vSphere 4.x, if not earlier which provides a mechanism to retrieve some of this information as well as custom properties. The OVF feature provides users with the capability to pass in any type of metadata information such as application start up parameters, network configuration, password management, etc. directly into the guestOS for flexible guest customization.

The OVF runtime environment is only available while the VM is powered and it can be accessed from either VMware Tools or from a special ISO that is mounted to the guestOS CD-ROM device. To enable the OVF runtime environment, you just need to perform these two simple steps:

1. Edit your VM and select the Options tab and enable the vApp Options:
2. Under the OVF Settings, specify the how you want to access the OVF environment by either VMware Tools or ISO Image transport:
If you are interested in enabling this using the vSphere API, take a look at the vAppConfig property. You can enable OVF runtime environment on a running VM, but the changes will not go into effect until the VM has been completely powered off and then powered back on, a guestOS reboot will not suffice. 

After the settings have been applied, go back into the OVF Settings for a powered on VM and you now should be able to click on the "View" button which will show you the OVF runtime environment for that particular VM.
For a vanilla VM, you should see three basic things:
  • The vCenter MoRef of the VM (vApp property is only available with vCenter and not on a standalone ESXi host)
  • The hypervisor name and version
  • The network (Portgroup/Distributed Portgroup) the VM is connected to
To retrieve this same information from within the guestOS you have two options:

VMware Tools


Run the following command vmtoolsd --cmd "info-get guestinfo.ovfenv"

Below are two examples for both a Linux and Windows VM:

ISO Image


Mount the CD-ROM in the guestOS and inside you will find the ovf-env.xml file which contains the OVF runtime environment information.
As I mentioned earlier, you can also create custom key/value properties which can then be accessed by the guestOS VM. If you go to Advanced section and click on the Properties button, you will be able to add your own custom properties. Below is a screenshot of adding three customer properties called: application_owner, startup_option and system_owner just to give you an idea of the possibilities.
The OVF runtime environment does not just stop with vSphere, but it is also available to VMs running in vCloud Director. The only requirement is that vCloud Director VMs has the vApp options enabled at the vSphere layer as noted earlier. Below is a screenshot for a VM that has been imported into vCloud Director from vSphere and you will notice some additional "vCloud Director" specific properties.
Even though the OVF runtime environment makes it easier to retrieve some of these "underlying" infrastructure details, I am still interested in some of the use cases where you would need to know the hypervisor version or MoRef ID from within the guestOS. If you are currently requiring this or other bits of information, please leave a comment about your particular use case.

Thunderbolt Ethernet Adapter in Apple Mac Mini on ESXi 5

$
0
0
If you followed Apple's recent announcement at their WWDC conference then you would know that they just released a Thunderbolt to Gigabit Ethernet adapter. So, why am I talking about this? Well if you are running ESXi 5 on an Apple Mac Mini like me, then you are probably wondering if you can get another network interface on the Mini as it only has a single network adapter. The answer is YES!
To get ESXi 5 to recognize the Thunderbolt adapter, you will need to download and install an additional Broadcom driver (tg3 3.123b.v50.1) or you can create a customized ISO with the driver built in using the steps outlined here for a new installation.

If you are just installing the driver on an existing ESXi 5 installation, extract the offline bundle and upload to your ESXi host and run the following command:
esxcli software vib install -d /vmfs/volumes/mini-local-datastore-1/tg3-3.123b.v50.1-offline_bundle-682322.zip

Here is the output from ESXCLI on how ESXi sees the Thunderbolt adapter:
As you can see, it shows up with no description for the device and this is the same when running lspci, it just shows up as a network controller from Broadcom. This is not a big deal, but I assume this has something to do with the high numbering of the vmnic instead of being vmnic1 it's vmnic32.

I also performed some basic network testing by yanking the ethernet cable on the onboard network adapter and ensured traffic continued to flow and vice versa with the other Thunderbolt adapter. Everything works beautifully and now you can have some network redundancy built into your Mac Mini or if you need the throughput for all those VMs you plan on running ;)
Big thanks to Randy K. for hooking me up with a Thunderbolt adapter!


How to Copy VMs Directly Between ESXi Hosts Without Shared Storage

$
0
0
There were some discussions earlier this week about copying Virtual Machines from one ESXi host to another ESXi host that reminded me of a very cool feature in the ovftool that could help with this task(which I thought I had written about already). As you probably have guessed by now, I am a big fan of the ovftool and have written several articles here, here and here. It still surprises me with the amount of features this little utility contains and this particular one is definitely a cool one!

If you have ever needed to copy a Virtual Machine from one host to another, it can be a challenge sometimes, especially if you do not have shared storage. You can of course leverage tools like VMware Converter or exporting the VM to a "middle man" system and then re-importing that VM into the destination host but it could take awhile or you have to run a Windows system. Well, if you are looking for a quick and easy way to copy a VM from one host to another, try using the ovftool.

In this example, I have two ESXi hosts called vESXi-03 and vESXi-04 and they both contain a single local datastore (no shared storage). I have a VM called vMA5 that is located on vESXi-03 and I would like to copy that directly to vESXi-04 without needing any additional storage.

Here is an example of using ovftool to probe the ESXi host to see the list of available VMs:
Note: A VM must be powered off for ovftool to transfered or exported.

Now that we have identified our VM, we just need to specify the source ESXi host and the destination ESXi host as well as the datastore using the -ds option. Here is an example of using ovftool to export the VM from one ESXi host to another ESXi host:
There are also other options that you can specify such as the network configuration and power options, please refer to the ovftool documentation for more details.

If you open up a vSphere Client connection to each of your ESXi hosts, you will see that the source host will have an export task and the destination host will have an import task as shown in the screenshot below:
Pretty nifty huh? :)

If anyone is interested in how this works, the export/import process of a VM to an ESXi host is using the NFC (Network File Copy) protocol and as long as two hosts can communicate with each other, then you can leverage ovftool to copy your VMs.

How to Change the Splash Screen In vMA

$
0
0
To customize the default splash screen on vMA 5.x, you just need to edit /opt/vmware/etc/isv/welcometext which contains the version of vMA and the management URL as the default.
In addition to adding your own custom text, there are a few special variables that can use within the file and they should all be pretty self-explanatory:

${app.name}
${app.version}
${app.ip}
${app.url}
${vami.port}
${vami.url}

Here is an example of custom welcometext file:
This is a message on the vMA Splash Screen!

visit www.virtuallyghetto.com

Here are some default variables you can use:

app.name = ${app.name}
app.version = ${app.version}
app.ip = ${app.ip}
app.url = ${app.url}
vami.port = ${vami.port}
vami.url = ${vami.url}
The vami_login script is what controls the splash screen display and for the changes to take effect, you will need to restart the process. To do so, you just need to kill the current vami_login process and it will automatically respawn.

sudo kill $(ps -ef | grep vami_login | grep -v grep | awk '{print $2}')

Here is a screenshot of what the splash screen looks like after modifying the welcomtext file:
If you are interested in customizing other parts of vMA such as the MOTD (message of the day) which is the text that would be dispalyed upon a successful login, you can edit /etc/motd file. If you are interested in customizing the banner during an SSH connection, you can edit /etc/ssh/banner.

Inactivity Timeout for the vSphere C# Client

$
0
0
I recently came across an interesting VMTN thread in which I learned about a neat little feature that allows a user to configure an inactivity timeout for the vSphere C# Client. Once the timeout value has been reached, the vSphere Client will automatically disconnect from the server(vCenter 5.0 or ESXi 5.0 Server). This feature looks to have been introduced with the release of vSphere 5 and was noted in thick-client-timeout guideline in recent release of the vSphere 5 Security Hardening Guide to help reduce the risk of unauthorized access.

There are two methods you can configure the inactivity timeout value:
  • Command-line argument to vSphere Client executable
  • vSphere Client configuration file (VpxClient.exe.config)
To configure using the command-line argument, locate the vSphere Client executable on your desktop and right click and select properties. You will need to add -inactivityTimeout X, where X is the number of minutes before the vSphere Client will automatically disconnect from the server.
To configure using the vSphere Client configuration file, you will need to locate the VpxClient.exe.config (thanks to user regnak2012 for identifying the required XML entry).
Depending on whether you are running a 32bit or 64bit WindowsOS, they will be located in one of the two places:
  • 32bit - %PROGRAMFILES%\VMware\Infrastructure\Virtual Infrastructure Client\Launcher
  • 64bit - %PROGRAMFILES(x86)%\VMware\Infrastructure\Virtual Infrastructure Client\Launcher
Next, you will need to right click on VpxClient.exe.config and edit the file using an editor such as notepad. Add the following entry right above the cmdlineFallback, where X is the number of minutes for the timeout value and save then save the file.

<inactivityTimeout>X</inactivityTimeout>

To validate that inactivity timeout value works, just connect to either a vCenter Server 5.0 or ESXi 5.0 Server and wait for it to disconnect after the timeout value has been violated. In this example, I configured it for 1 minute and you should see the following screen below once it has disconnected.
Since this feature is client side only, a user can easily change or update this timeout value. One option to guarantee this configuration is by ThinApp-ing your vSphere Client, this way you can control who has access and what the inactivity timeout should be. This can really help when it comes to auditing client side system.

While looking into the vSphere Client options, I also came across a few others that are not documented but might come in handy.

Disclaimer: These are not officially supported by VMware, please use at your own risk. 

Ignore Certificate - If you have a self-signed SSL certificate when you first connect to an ESX(i) or vCenter Server, you probably have seen the following:
You can automatically ignore this message by specifying the -i command-line option OR add <ignorecert /> in the VpxClient.exe.config file.

Expand Inventory - If you want to have your entire vSphere inventory automatically expanded out for you each time you login (this may not be a good idea for very large environments) you can specify -expAll command-line option OR add <expAll /> in the VpxClient.exe.config file.

Disable All vSphere Plugins - If you want to prevent any vSphere Plugins from loading, you can specify -noPlugins  command-line option OR add <noPlugins /> in the VpxClient.exe.config file.
Viewing all 217 articles
Browse latest View live